
Color swatches in Photoshop are far more useful than they might seem. Many beginners overlook them, but custom swatches can seriously boost your workflow and help you keep designs consistent. Let’s break down why color swatches are more useful than they look, and how you can open the Swatches panel to start using them.
Colors are at the core of every project, whether you are editing a photo, creating a poster, or designing for the web. Choosing the right colors from the Swatches panel saves time and keeps your workflow consistent and professional.
This is where Photoshop’s color swatches come in. They let you save, reuse, and organize your favorite shades so you don’t have to start from scratch each time. For example, if you create your own swatches, you won’t have to hunt for the same color every time, and your designs will stay on track.
If you’re new to Photoshop, start with my Photoshop Introduction and Features in Detail guide. Building this foundation first will make it much easier to understand and use color swatches effectively.
What Are Color Swatches in Photoshop?
Color swatches in Photoshop work like a painter’s palette sitting next to the canvas. Once you place your favorite colors there, you can dip into them again and again without mixing from scratch. This makes your workflow smoother and ensures the same shades appear across all your designs.
Swatches are especially helpful when you:
- Keep your brand colors close so every project feels on point and consistent.
- Build and save custom palettes that fit the mood or style of each design.
- Jump back to your go-to shades with one click instead of digging around every time.
Photoshop color swatches, also known as Adobe color swatches, allow you to organize and reuse colors, ensuring your project looks orderly and professional.
How to Open the Swatches Panel in Photoshop
In Adobe Photoshop, many of the tools you need are organized in panels, and the Swatches panel is one of the most useful. Inside, you’ll find a built-in collection of colors that are ready to be applied to your designs.
By default, the Swatches panel appears on the right-hand side of your workspace, but if you are new to Photoshop, it is easy to miss since there are so many panels open at once.
To open it manually, go to: Window > Swatches
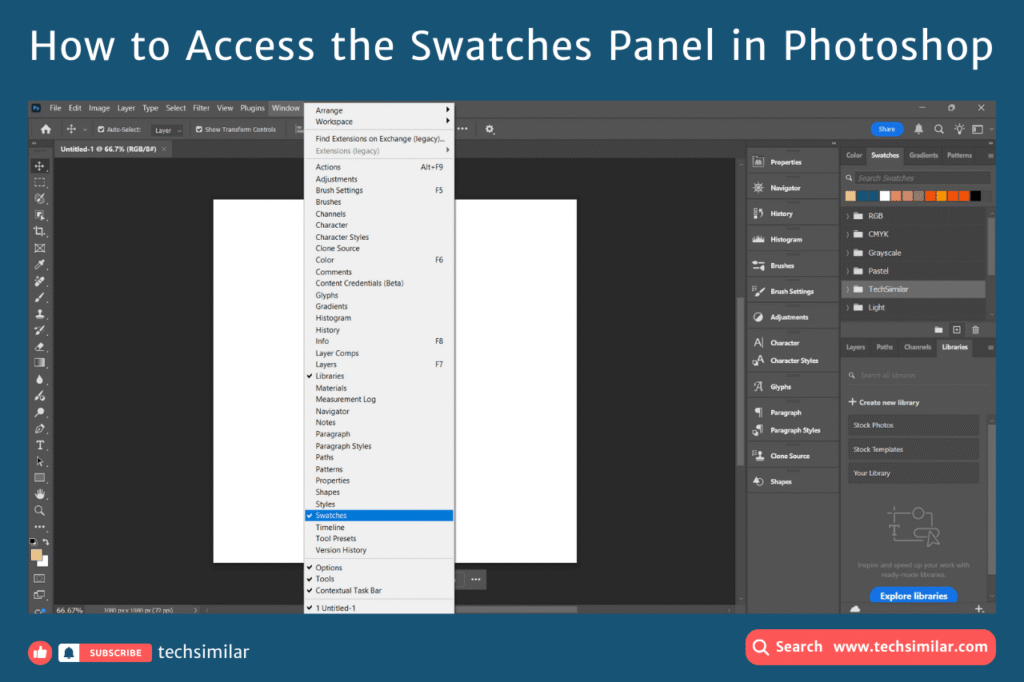
Once opened, you’ll find default color sets like RGB, CMYK, and Grayscale. From here, you can begin saving and organizing your favorite shades, which improves workflow and ensures consistent design.
Final Thoughts
Color is one of the most powerful tools in Photoshop, and swatches are your shortcut to using it more effectively. Start by creating a few custom swatches today. They could be your favorite shades, a client’s brand colors, or simply the tones you reach for most often. Once you get used to having them ready, you’ll wonder how you ever worked without swatches.
If you’re ready to take the next step, check out the upcoming guide on Photoshop’s Color Panel. There, we’ll dive deeper into color modes, hex codes, and some common mistakes to avoid when working with color.